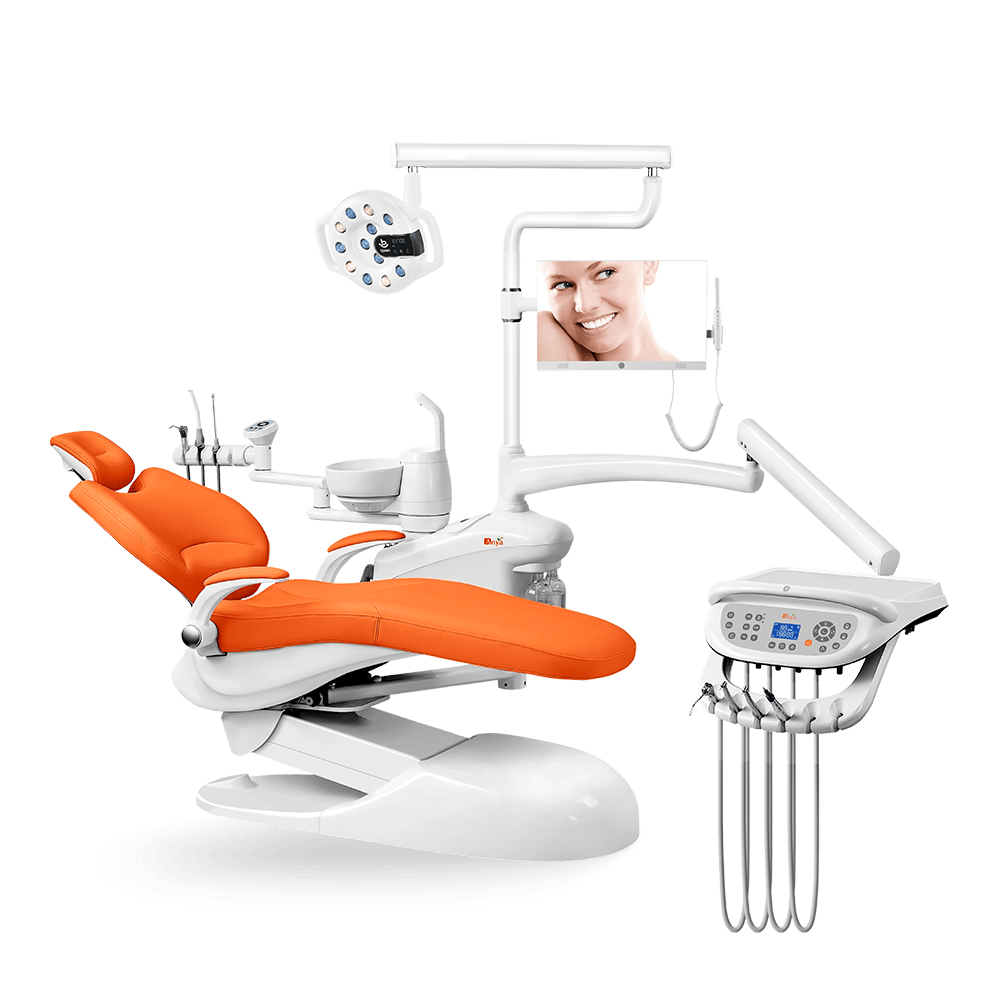
A pediatric dental operatory setup is not just an adult treatment room with brighter colors. For equipment buyers, the important questions are patient access, positioning, visibility, assistant reach, parent or caregiver movement where appropriate, cleaning workflow, and whether the chair configuration can be repeated and serviced. The chair should help the team position smaller patients calmly and clearly without blocking the daily workflow.
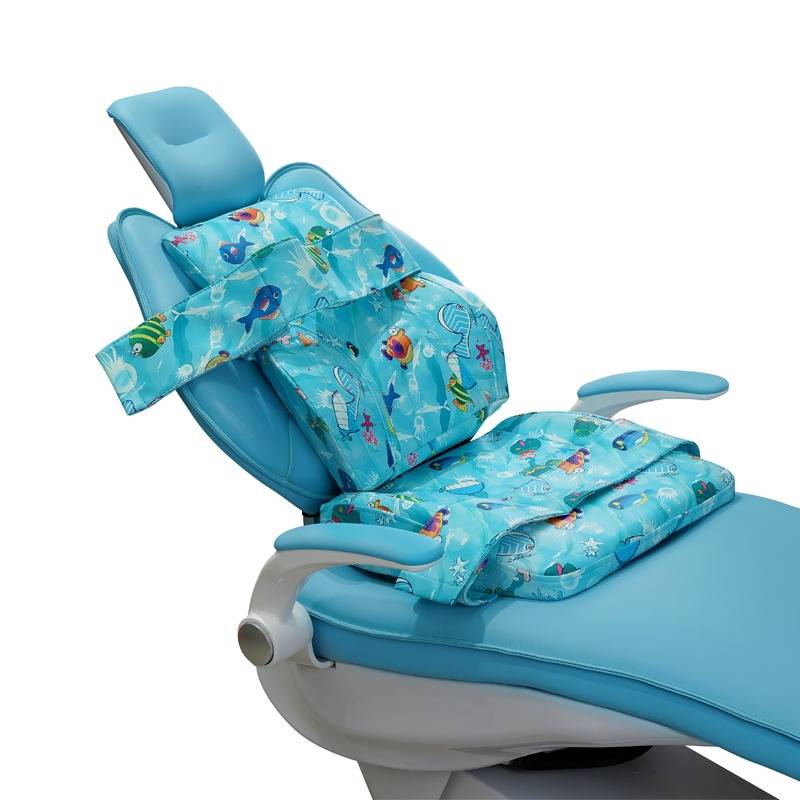
This guide is for family clinics, pediatric dental practices, dealers, and clinic planners choosing chair features for child patient visits. It uses Anya’s Cojín infantil para sillón dental AY-DCS001 as a product reference, but it does not invent age ranges, material claims, dimensions, or clinical outcomes. Buyers should confirm the intended chair configuration, accessory fit, cleaning instructions, service route, and documentation before ordering.
Pediatric Dental Operatory Setup Starts With the Chair
The chair is the center of the pediatric operatory because it affects entry, positioning, visibility, assistant access, and how the patient experiences the room. A room may look friendly, but if the child is positioned poorly or the assistant cannot reach suction and instruments, the workflow becomes stressful for everyone.
Start with the clinic’s real patient mix and appointment flow. A family clinic that occasionally treats children may need a different setup than a dedicated pediatric room. A mixed-use operatory may need removable accessories, clear storage, and a repeatable setup checklist so staff can change between adult and child appointments without guesswork.
If the room layout is still being planned, review the dental operatory layout requirements and the categoría de unidades dentales before finalizing the chair position.
Plan the Room Around the Appointment Flow
Pediatric appointments often require more setup clarity than the equipment list suggests. The team may need to greet the child, explain the chair, help the patient sit, adjust an accessory, position the headrest, bring the light into place, and keep the assistant side clear. If the room is tight or the setup changes from appointment to appointment, those small steps can slow the day down.
Map the appointment flow before choosing the final chair package. Where does the child enter? Where does the staff member stand while giving instructions? Where can a caregiver be present if clinic policy allows it? Where is the accessory stored before and after use? How does the assistant reach suction once the child is positioned? These questions are ordinary, but they prevent a pediatric setup from becoming a collection of disconnected products.
Chair Features That Matter
Patient entry and exit
Children may need more support and clearer guidance when entering or leaving the chair. Buyers should check the approach path, side access, armrest behavior, and whether the room leaves space for staff support. The goal is practical access, not a claim that one chair design solves every pediatric situation.
Booster, cushion, and accessory fit
Accessories such as a child seat cushion can help adapt a chair for smaller patients when the exact setup is appropriate. The buyer should check whether the accessory sits as intended, whether it interferes with chair movement, whether it affects light or suction reach, and how it is removed and cleaned according to supplier instructions.
Headrest support
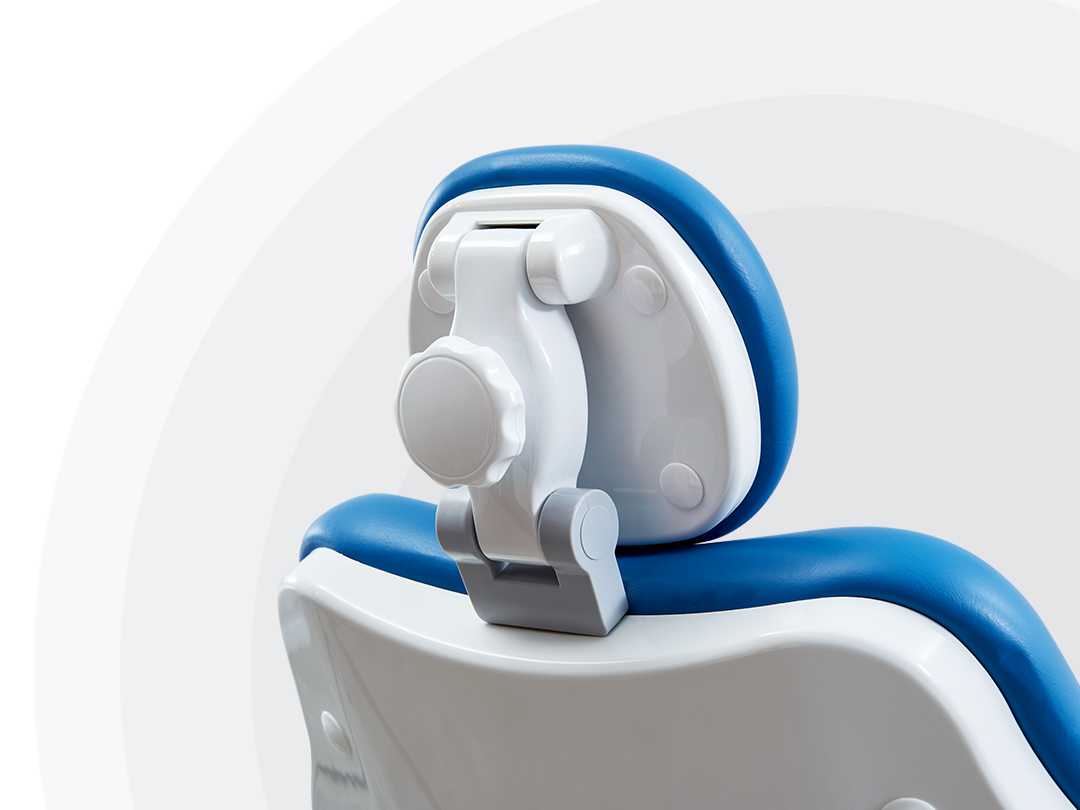
The headrest should support positioning and visibility for the clinic’s patient mix. A headrest that works well for adults may need careful adjustment for child patients. Review the dental chair headrest types guide and ask the supplier to confirm the exact chair configuration.
Armrest access
Armrests can either support entry and exit or create an obstacle. Confirm whether the selected chair’s armrests, movement, and side access fit pediatric use and room layout. The dental chair armrest design article gives additional access and workflow checks.
Visibility, light, and suction reach
Once a child is positioned with any accessory, the dentist and assistant still need clear visibility, light reach, suction access, and instrument handoff. Do not approve the setup based only on an upright product photo. Test or review the working position that the clinic will use most often.
Anxiety-aware communication environment
Equipment cannot guarantee a calm appointment, but the room can avoid adding unnecessary stress. Keep the chair approach clear, reduce clutter near the patient, and choose a setup that lets staff explain the next step without moving around awkward obstacles. A room that is easy for the team to use is usually easier for the patient to understand.
Cleaning and storage
Accessories should have a defined storage and cleaning routine. Staff should know where the cushion or accessory is kept, who places it, who removes it, how it is cleaned according to instructions, and how the room is reset for the next patient. If the setup is mixed-use, this routine matters even more because adult and child appointments may use different accessories.
Pediatric Chair-Feature Checklist
| Area | What to check | Safe buyer angle |
|---|---|---|
| Patient access | Entry path, exit path, side access, staff support space, and caregiver proximity where appropriate. | Focus on practical movement, not clinical promises. |
| Accessory fit | Child cushion or seating accessory position, stability, chair movement, storage, and cleaning steps. | Confirm fit with the intended chair configuration. |
| Headrest | Adjustment range, support with smaller patients, lock behavior, and visibility. | Ask how positioning works for the clinic’s patient mix. |
| Armrests | Fixed or movable behavior, side access, patient transfer path, and operator clearance. | Check whether armrests help access or block the workflow. |
| Visibility | Light reach, mouth access, assistant sightline, and chair position after accessories are added. | Review the working position, not only catalog photos. |
| Parent and staff movement | Room for staff explanation, assistant movement, stool path, and cabinet access. | Follow clinic policy for caregiver presence and room use. |
| Cleaning workflow | Removable accessories, touched surfaces, storage, barrier workflow, and cleaning instructions. | Follow model-specific instructions and clinic policy. |
| Documentación | Configuration sheet, accessory list, cleaning instructions, service contact, and parts references. | Keep the setup repeatable for every team member. |
Standard Chair, Pediatric Setup, or Mixed-Use Room?
| Setup type | Mejor ajuste | Strengths | Tradeoffs | Buyer checks |
|---|---|---|---|---|
| Standard chair with accessories | Family clinics with occasional child visits. | Flexible room use and simpler scheduling. | Accessory fit must be checked; adult chair geometry may still feel large. | Cushion fit, headrest range, armrest access, cleaning steps, and storage. |
| Dedicated pediatric setup | Clinics with frequent pediatric appointments. | The room can be planned around child access, communication, and faster reset routines. | Less flexible for adult procedures and may need a separate equipment budget. | Complete configuration, chair range, delivery reach, utility plan, and service support. |
| Mixed-use room | Clinics treating children and adults in the same operatory. | Efficient room utilization and flexible scheduling. | More setup and reset decisions; accessories can be misplaced or poorly documented. | Setup checklist, storage, barrier workflow, staff training, and repeatable positioning. |
Common Pediatric Operatory Setup Mistakes
- Treating the chair as an adult chair plus decoration instead of checking access, reach, and workflow.
- Choosing a cushion or booster-style accessory without reviewing headrest position, armrest movement, and suction or light reach.
- Forgetting space for parent or caregiver communication where clinic policy allows it.
- Letting accessories block assistant access or delivery-system movement.
- Making unsupported claims about child-size dimensions, safety certification, material properties, or clinical outcomes.
- Using product photos that imply a configuration not described in the quote.
- Failing to request exact model configuration, manuals, cleaning instructions, service contact, and replacement references.
Perspectiva del fabricante y del distribuidor
Manufacturers and dealers need the buyer to describe the room clearly. A useful request includes chair model, room type, patient mix, whether the room is pediatric-only or mixed-use, accessory questions, headrest and armrest concerns, light and suction reach, cleaning workflow, and service expectations.
Dealers should avoid presenting a single product image as a complete pediatric solution. Instead, they should show how the chair, accessory, headrest, armrests, assistant access, and cleaning process work together. If a clinic wants to standardize several pediatric rooms, the dealer should also help the buyer keep configuration names, accessory lists, and replacement references consistent.
Questions to Ask Before Ordering
- Which chair model and configuration will be used for pediatric appointments?
- How will the child seating accessory fit the selected chair and headrest position?
- Will the armrests support access, or will they block the side where staff need to help?
- Can the assistant reach suction and instruments after the child is positioned?
- Where will the accessory be stored, cleaned, and documented between appointments?
- Does the room leave enough movement space for staff and caregiver communication where appropriate?
- What manuals, cleaning instructions, service contacts, and replacement references are available?
These questions turn a pediatric room from a visual idea into a working setup. They also make it easier for the supplier to confirm what belongs in the quote and what the clinic should verify locally before installation.
PREGUNTAS FRECUENTES
What is a pediatric dental operatory setup?
It is a treatment-room setup planned for child patient access, positioning, visibility, staff movement, cleaning workflow, equipment reach, and repeatable documentation.
Can a standard dental chair work for pediatric visits?
In some clinics, yes. The chair, headrest, armrests, accessories, light, suction, and room workflow should be checked together before the buyer relies on it for pediatric visits.
What chair feature matters most for pediatric use?
No single feature is enough by itself. Access, accessory fit, headrest support, armrest behavior, visibility, and cleaning workflow need to work as a system.
Should clinics choose a dedicated pediatric setup?
It depends on patient mix, appointment volume, room availability, budget, and staffing workflow. A family clinic and a pediatric-focused clinic may need different equipment decisions.
What should buyers confirm before ordering?
Confirm the chair model, accessory fit, cleaning instructions, headrest and armrest behavior, light and suction reach, service route, and replacement references in writing.
Planning a pediatric dental operatory setup? Review the Cojín infantil para sillón dental AY-DCS001 and Anya’s unidades dentales, then Contacte a Anya Medical with your room type, patient mix, and configuration questions.